

It’s hard to find a classy looking bulletin board! And it can be even more difficult to find a nice big bulletin board. When we opened the design studio, I knew our big blank wall would look great with three large bulletin boards. And they would also be super functional for design time and client meetings, but I couldn’t quite figure out the best DIY method. Then, I came across an image on Instagram where my pal Erin Kestenbaum had used an old frame to create her board and the light bulb went off!

Here’s my MODERN BULLETIN BOARD DIY:
SUPPLY LIST
- Sheet of plywood (linked below 1/2″ thickness).
- Cork Tiles (workes better than a roll).
- Glue / bonding adhesive (not spray adhesive).
- Upholstery batting (thin polyester is fine).
- Fabric of choice
- Staple gun
- Utility knife
- Local frame shop or ready made frame
HOW TO MAKE YOUR MODERN BULLETIN BOARD:
- NOTE: Because I wanted three identical modern bulletin board (s) the list below was the best method for me. This could also be done with a new or vintage frame, and you could cut the plywood to fit. Depending on the size you want your boards, you’ll need to adjust the amount of cork tiles, batting and fabric you need using basic math.
- Step 1: Purchase a piece of 1/2 thick plywood, typical sheets at 4ft x 8ft. This was the perfect size to create three – 30″ x 40″ boards, which is the size of those pictured here. I had the staff at Home Depot cut the sheet into three pieces before I left the store.
- Step 2: Grab a nice quality glue while you are at the hardware store. This will help secure the cork tiles to the plywood. I tried a spray adhesive at first and it did not work.
- Step 3: Have your batting, fabric and staple gun all ready to go. You’ll need a nice work surface, like a dining room table to maneuver everything. If you are using a nice table in your home, I suggest padding table with pieces of cardboard and throwing an old sheet over that, so you don’t damage anything.
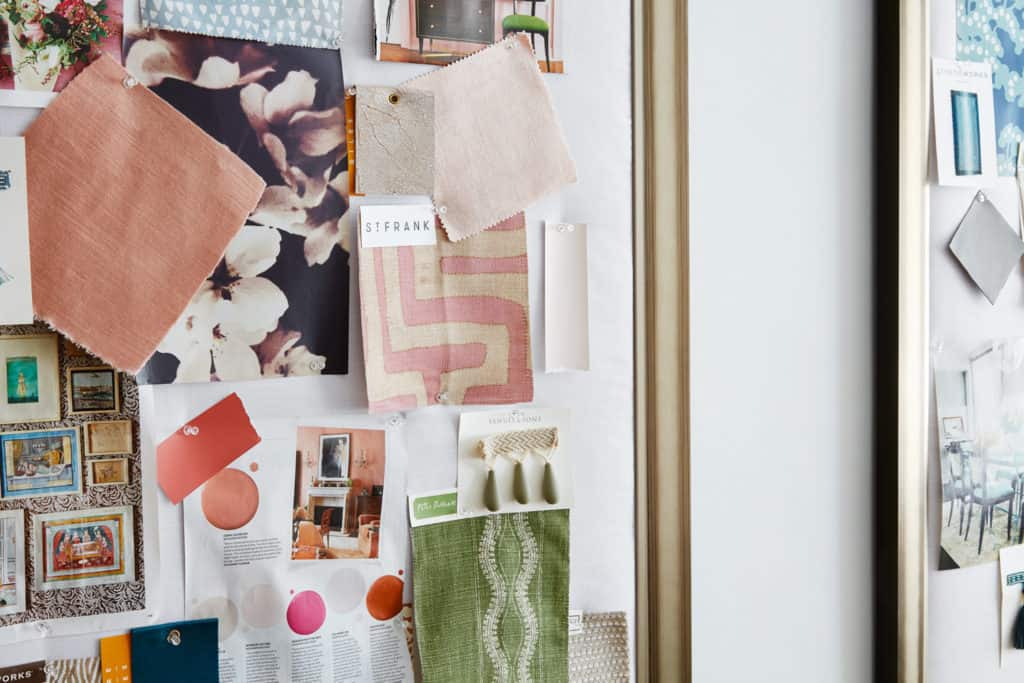
- Step 4: Determine front of your plywood. Glue your cork tiles to “front” of the plywood, if they hang off on the edge use a utility knife to score them and create a clean edge all the way around board. Make sure tiles are straight and tight to each other, no gaps. Once the batting and fabric are on you won’t see lines in the cork.
- Step 5: Now wrap your batting tightly around the front of the board. Use a staple gun to secure batting to back of the board. Batting should be pulled taught, but be careful not to rip it.
- Step 6: Iron your fabric if necessary and repeat Step 5 but with the fabric. Here’s a past post: DIY tutorial on upholstering a seat cover. Similar rules apply.
- Step 7: At this point, I put my prepped boards into garbage bags to keep fabric safe/clean and took them to my local framer. I picked a molding with a nice inset edge that would let the boards sit nicely inside. The framer then actually built the frame, put on a backing board and hangers for me. These weigh about 25 lbs, so it is important to have the strong hangers on the back. If you are doing this with a vintage or already made frame, I would use a sturdy cardboard / backer board of some sort, and then secure your hanging device into the back of the plywood.
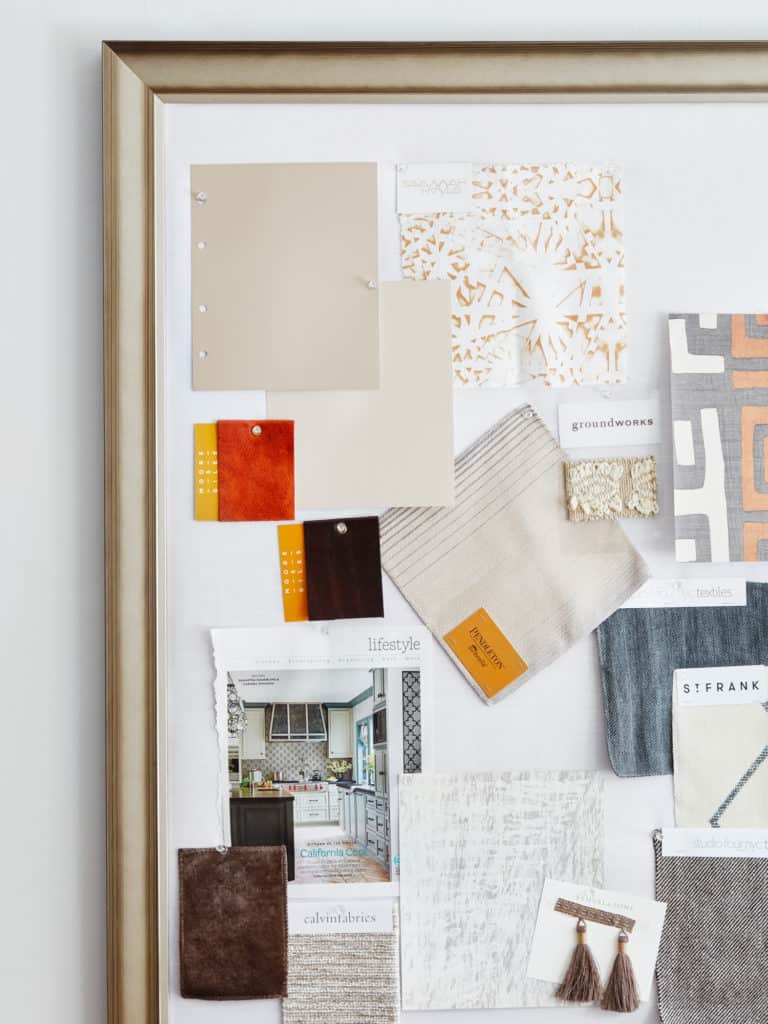
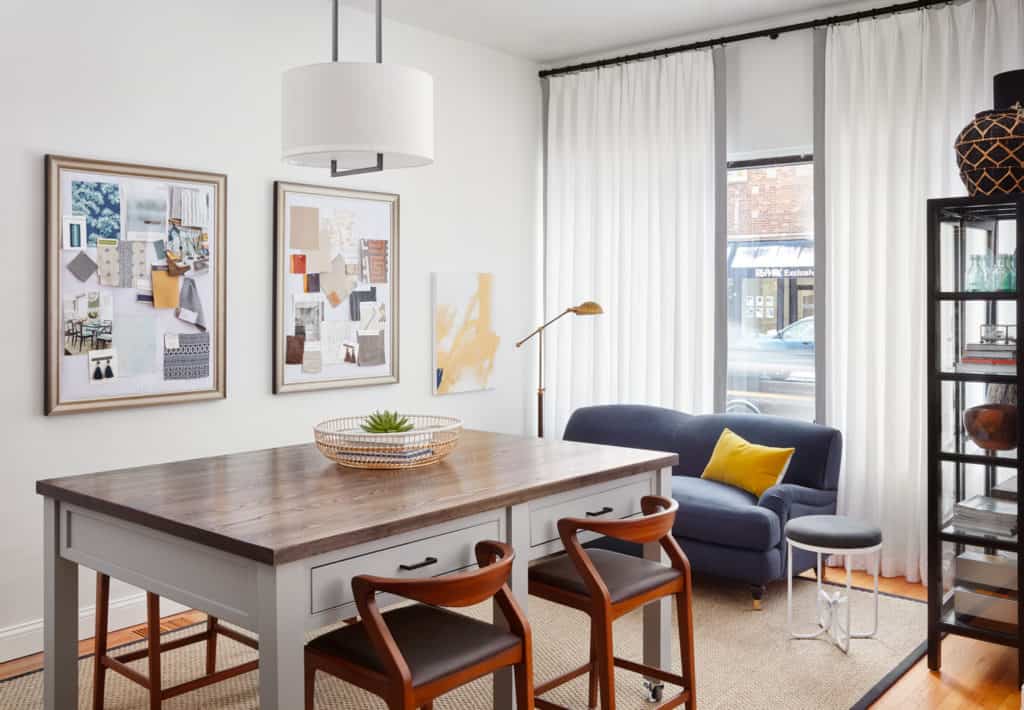
I love how they turned out! My main concern was if the cork would be thick enough to really hold items / fabrics well and so far it’s working out just fine. I think using longer push pins / or sewing pins helps. Hope you give this a try! There are so many cool variations to be made.
XO – CLAIRE
Leave a Reply
October 7, 2024
read the post
YOU MIGHT ALSO LIKE
April 17, 2024
read the post
September 2, 2021
read the post
August 24, 2021
read the post

Meet Claire
Claire’s creative energy comes from her unique perspective on the world as both a trained interior designer and a passionate yoga teacher. Her affinity for kitchen design, timeless style and eclectic decorating are shared here, along with lots of interior design education and tips. Thanks for being here, please enjoy!

