

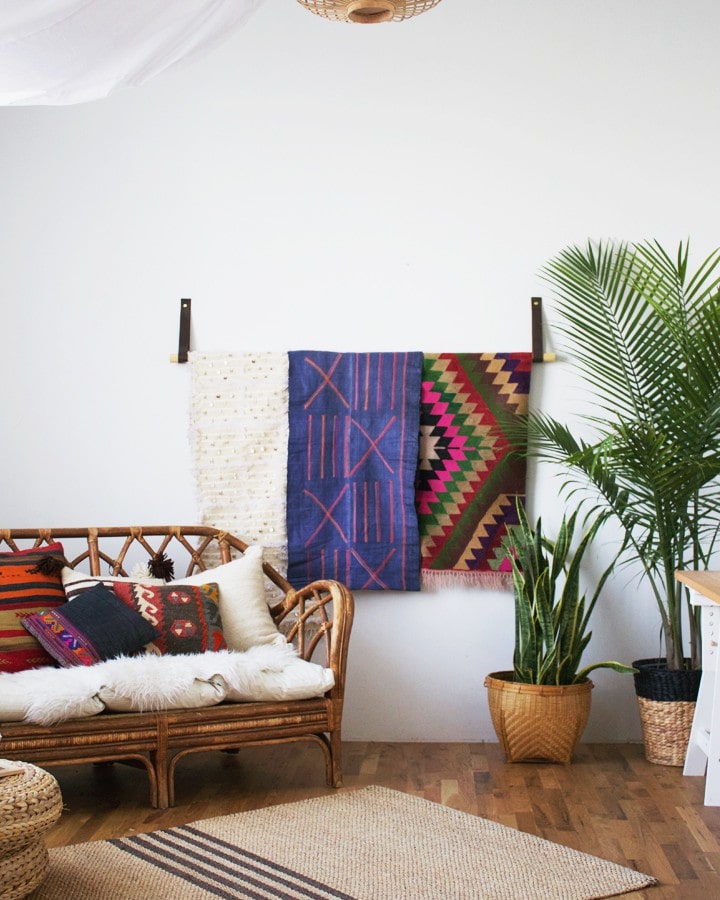
Last month I revealed the Foxtail + Moss studio makeover. Check it out HERE if you missed it! The Leather and Dowel Textile Display Hanger served as a decorative and versatile focal point in the girls’ studio. It is also one of the fastest and highest impact DIY projects I’ve ever done! Today, I’m sharing the directions with you.
Supply List:
- Wooden dowel from hardware store (we used 1” x 72” hardwood round from Home Depot)
- Leather strips from craft store (we used 1.5” x 42” cut to desired length from JoAnn Craft)
- Brass wood screws with matching brass washers (depending on your wall you may need drywall anchors)
- Power drill
- A level may help

Directions:
- Determine best location for your dowel and measure from the floor up making sure your marks (for your holes) are level and even.
- Pre drill your holes with power drill bit.
- Use drill to put screws through both layers of leather securing leather to wall, and creating the loop to hold the dowel.
- Place your dowel through the leather holders, and hang your favorite textiles!
- You could get fancy and stain your dowel with some wood stain or paint it, if you wanted to change its color.
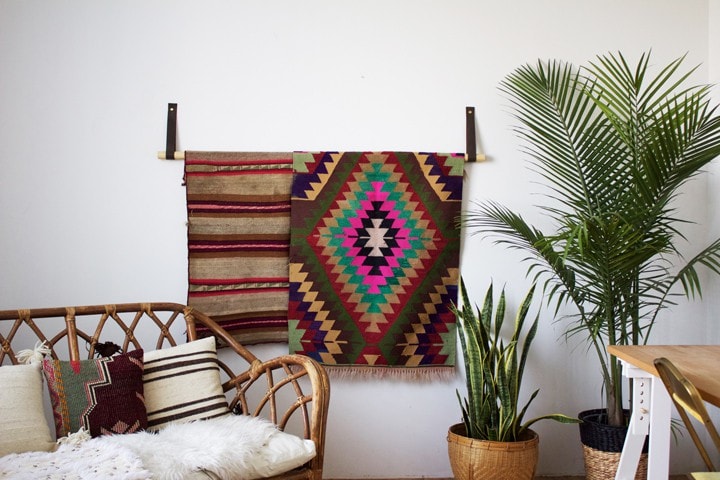
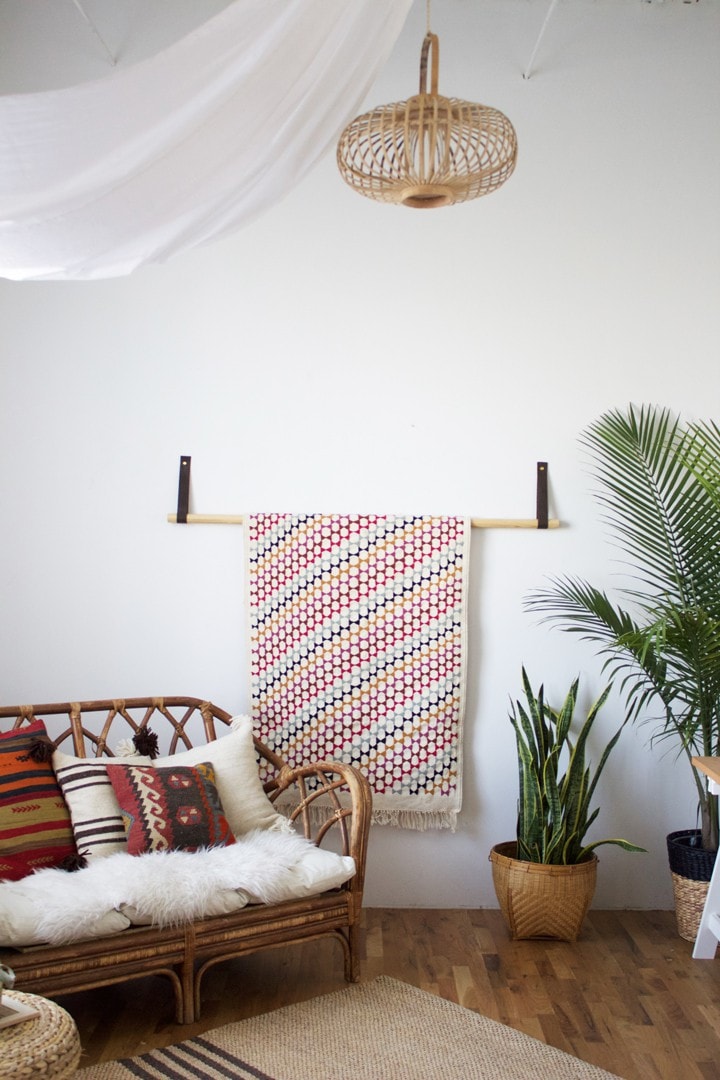
We tried hanging one, two and three textiles on the 72″ inch rod. I like the layered look best, but if you have one really large textile (probably even larger than the one below) this display is a great option too. I think it would also look fabulous as a headboard of sorts.
Let me know if you give this project a try. I’d love to see your finished results! Any questions? Just leave them in the comments and I’ll get back to you soon. Tag any projects on Instagram #womenwhomake and #centeredbydesign
This post was created in collaboration with Foxtail + Moss. All photography by Foxtail + Moss.
Leave a Reply
October 7, 2024
read the post
YOU MIGHT ALSO LIKE
April 17, 2024
read the post
September 2, 2021
read the post
August 24, 2021
read the post

Meet Claire
Claire’s creative energy comes from her unique perspective on the world as both a trained interior designer and a passionate yoga teacher. Her affinity for kitchen design, timeless style and eclectic decorating are shared here, along with lots of interior design education and tips. Thanks for being here, please enjoy!

