

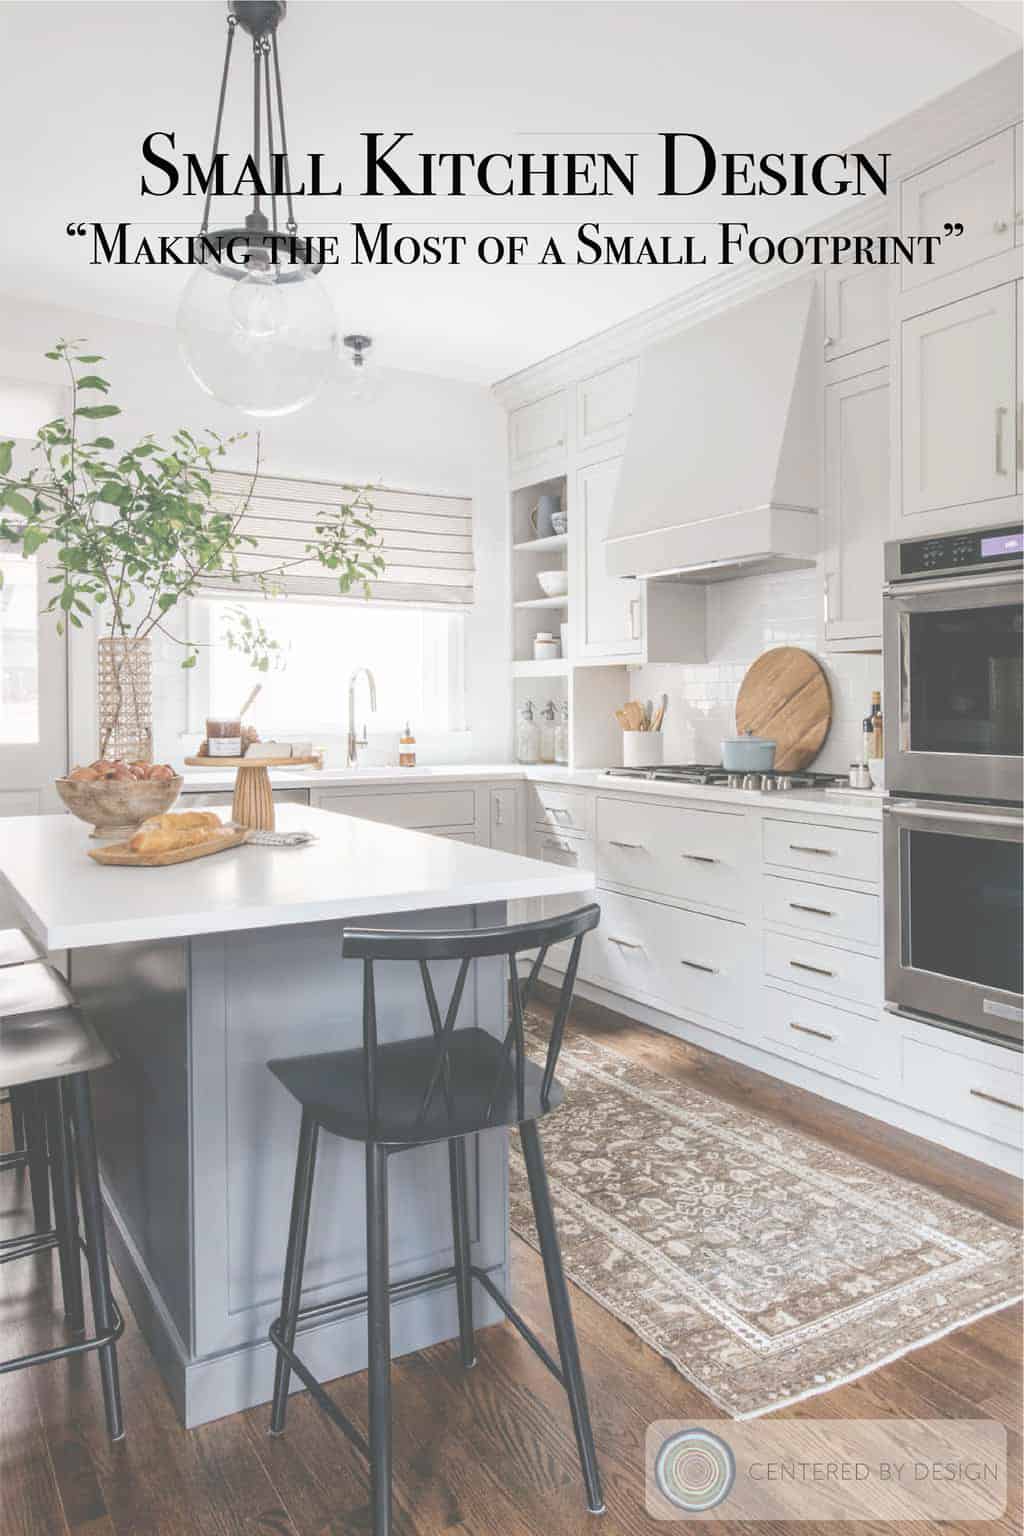
Evanston Kitchen Reveal: Making the Most of a Small Footprint
June 19, 2019
Designing kitchens is one of my absolute favorite parts of the interior design process. It’s the heart of the home and can set the tone for the overall look and feel of your house. We are revealing our latest completed kitchen in Evanston, IL. It’s great example of how small kitchen design can have a major impact and be very functional when planned and executed well!
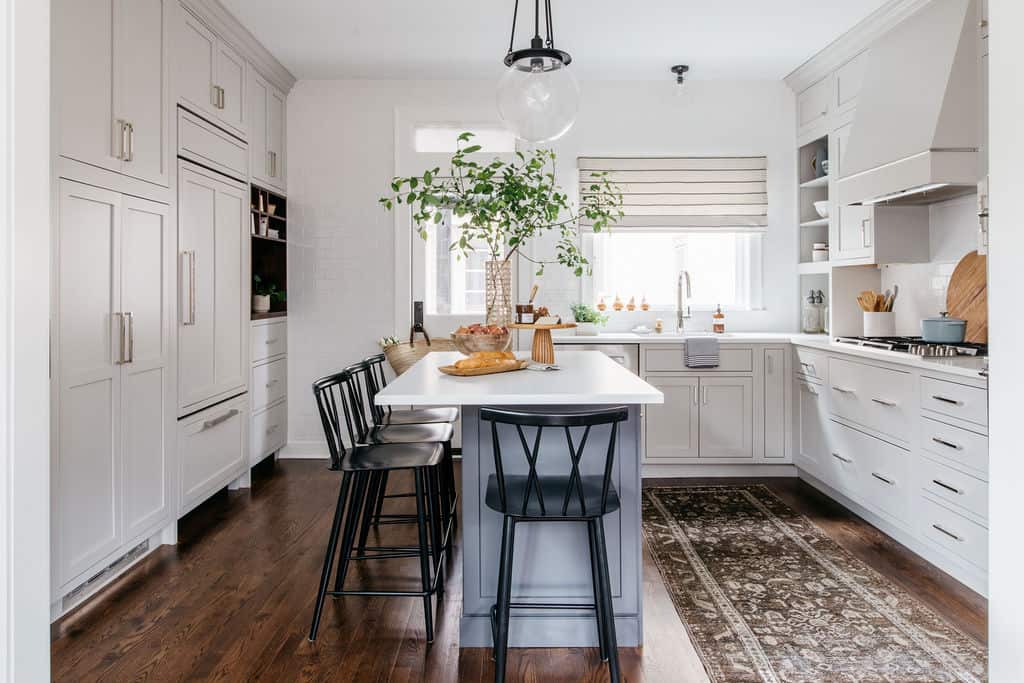
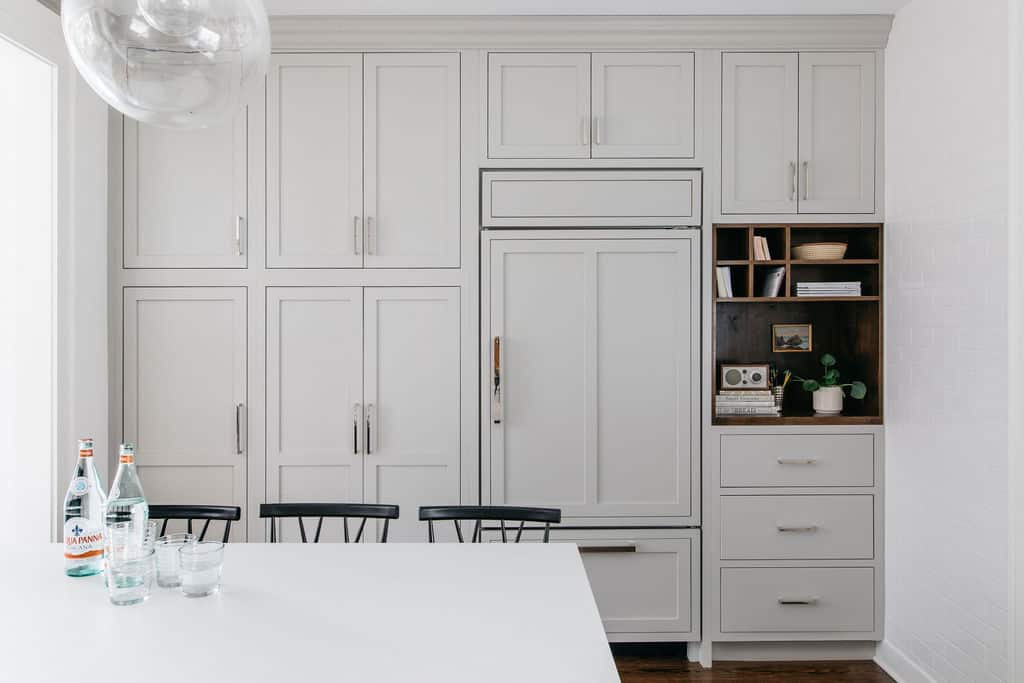
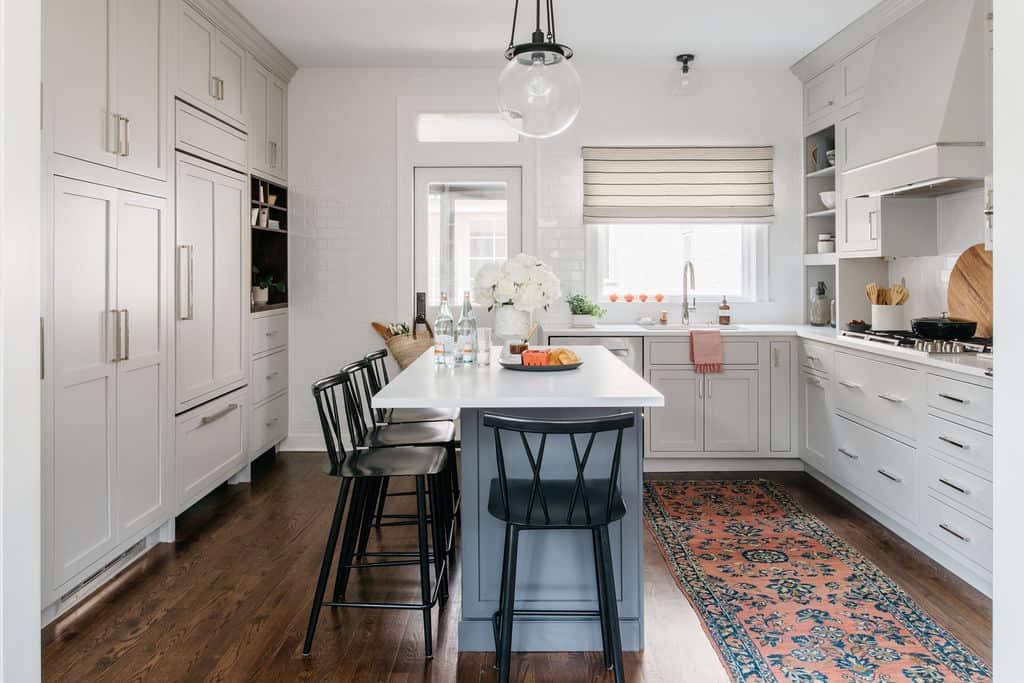
Evanston Kitchen – AFTER
DESIGNER TIPS FOR SMALL KITCHEN DESIGN:
Here are five of my designer tips for getting the most out of a small footprint and small kitchen design. Every inch of your floor plan and organization really count in small spaces! Also, you’ve got to think big and not be afraid to really change your room’s floor plan.
TIP #1 – FLOOR PLAN IS EVERYTHING (& ELEVATIONS ARE IMPORTANT TOO)
I highly recommend working with a designer, kitchen & bath showroom or your local home improvement store to make sure you have correct dimensions and a solid floor plan for your kitchen. This is even more important in tight spaces b/c centimeters matter in kitchen design! This is hard to do on your own as a novice because you need a program that can scale everything in the plan. Google Sketch up is free and can also help if you can teach yourself (watch videos, etc.) I partner with a great cabinetry showroom STUDIO 912, which is where this kitchen’s semi-custom cabinets are from.
These cabinets are the Starmark brand in Repose Gray tinted varnish (which is essentially a paint that is baked on for tougher finish). We also added a few custom elements like the hood and command center from a local wood working company. A few custom elements can really elevate your design!
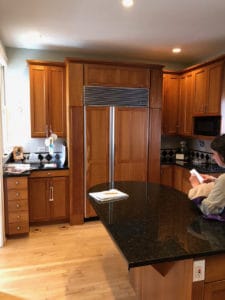
Below are different views of this Evanston, IL kitchen BEFORE. We thought hard about the new floor plan. Opening up the wall to dining room was always the goal, but we did not know how far exactly we could open it and I really encouraged the homeowner to close up the hall entry so we could get more cabinets and a symmetrical design on range wall. We also had to drywall over a window on the fridge side to get the wall-to-wall cabinetry design as intended. A lot of small (or big) changes which add up to give us an AWESOME new floor plan.
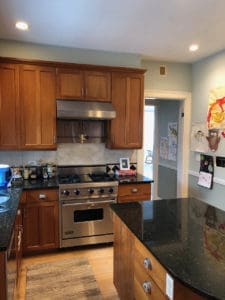
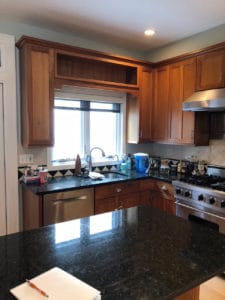
West wall became fully integrated by drywalling over existing window. Because we opened up wall to dining room we already had lots more light and were not concerned about losing a window.
TIP #2 – APPLIANCES & SCALE
This client really loves to cook. They wanted to fit a double oven and range. At first, I was not convinced we could get everything on that main wall and have it look good. We started with a larger double oven/range (the thinking was less appliances, but bigger capacity) and by the time we designed the hood on top the scale was just off. A 42 – 48″ size range was just way to big for this smaller scale kitchen. By scaling back to a cooktop and smaller hood, we had the room for the double ovens and still got a little bit of storage! It was a balancing act with cabinet sizes to keep hood and cooktop centered.

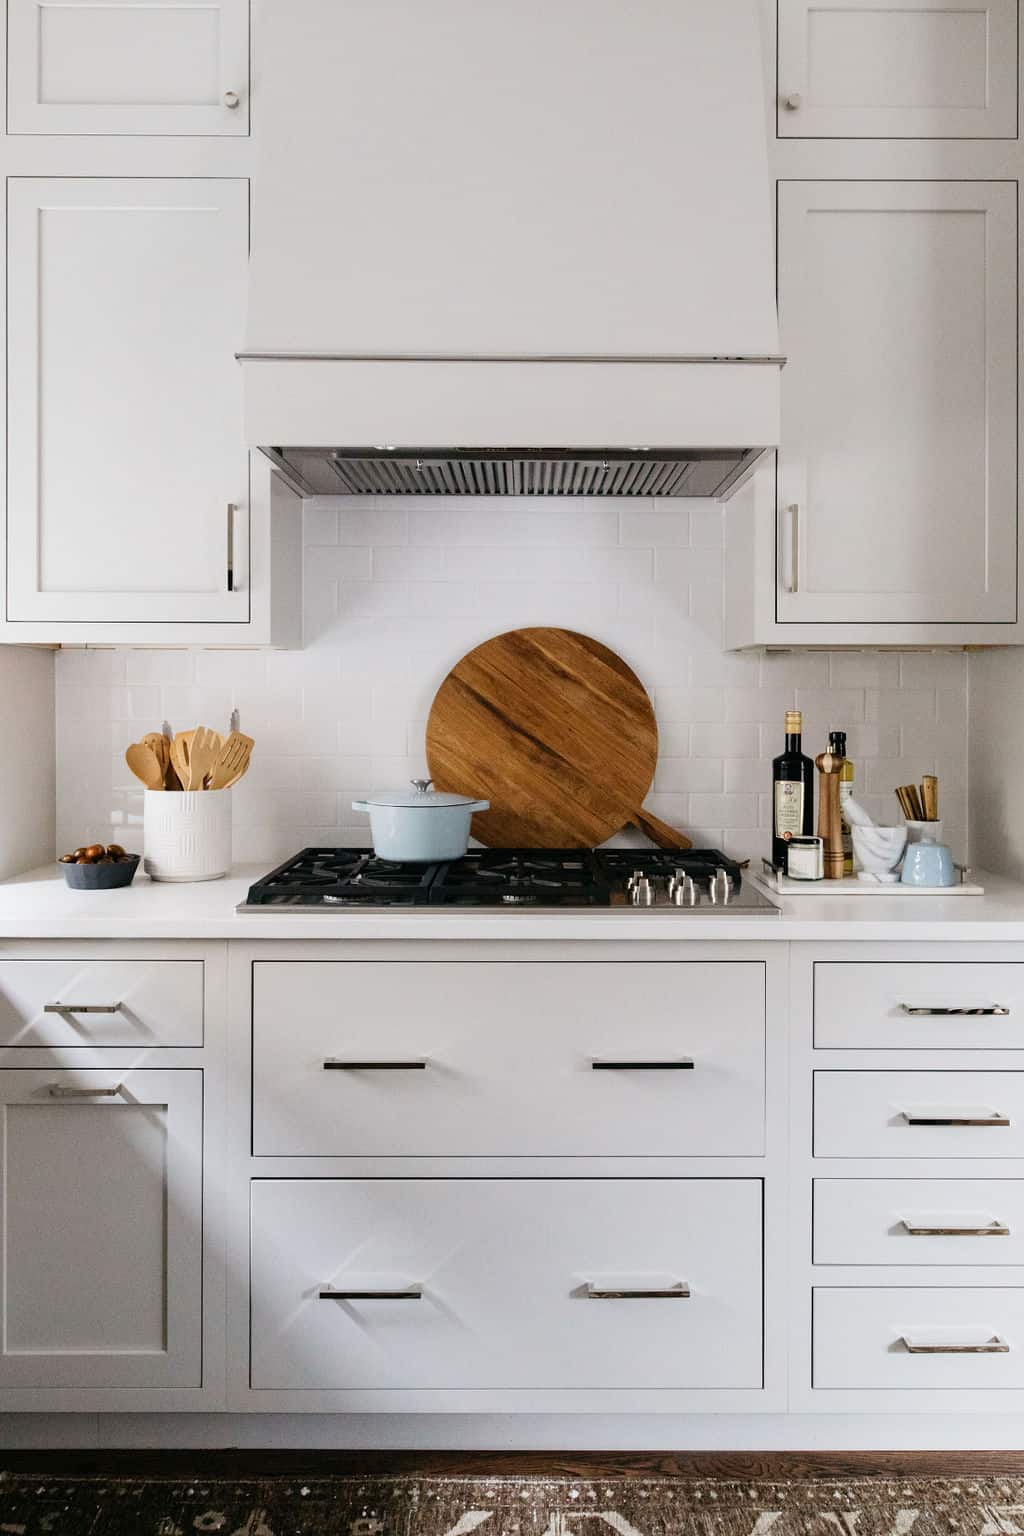
36″ cooktop with drawers underneath and custom wood hood with polished nickel metal detail
TIP #3 – YOUR CABINET DESIGN & STORAGE
Cabinets are likely your largest cost item in the kitchen design. When you are working with nicer cabinet lines you are able to make modifications, which can help you achieve a better design. For instance, it may be a small detail, but on the open shelving area I did not want to see the little holes on the side of the cabinet typical for adjustable shelving. We ordered this open cabinet without holes and installed the shelves on site for a more custom feel.
On the refrigeration wall, special attention was paid to a flush installation of the fridge. The tall pantry cabinets contain roll out trays at custom heights for the microwave, kitchen aid mixer and other goods making it easier for kiddos to reach their own snacks.

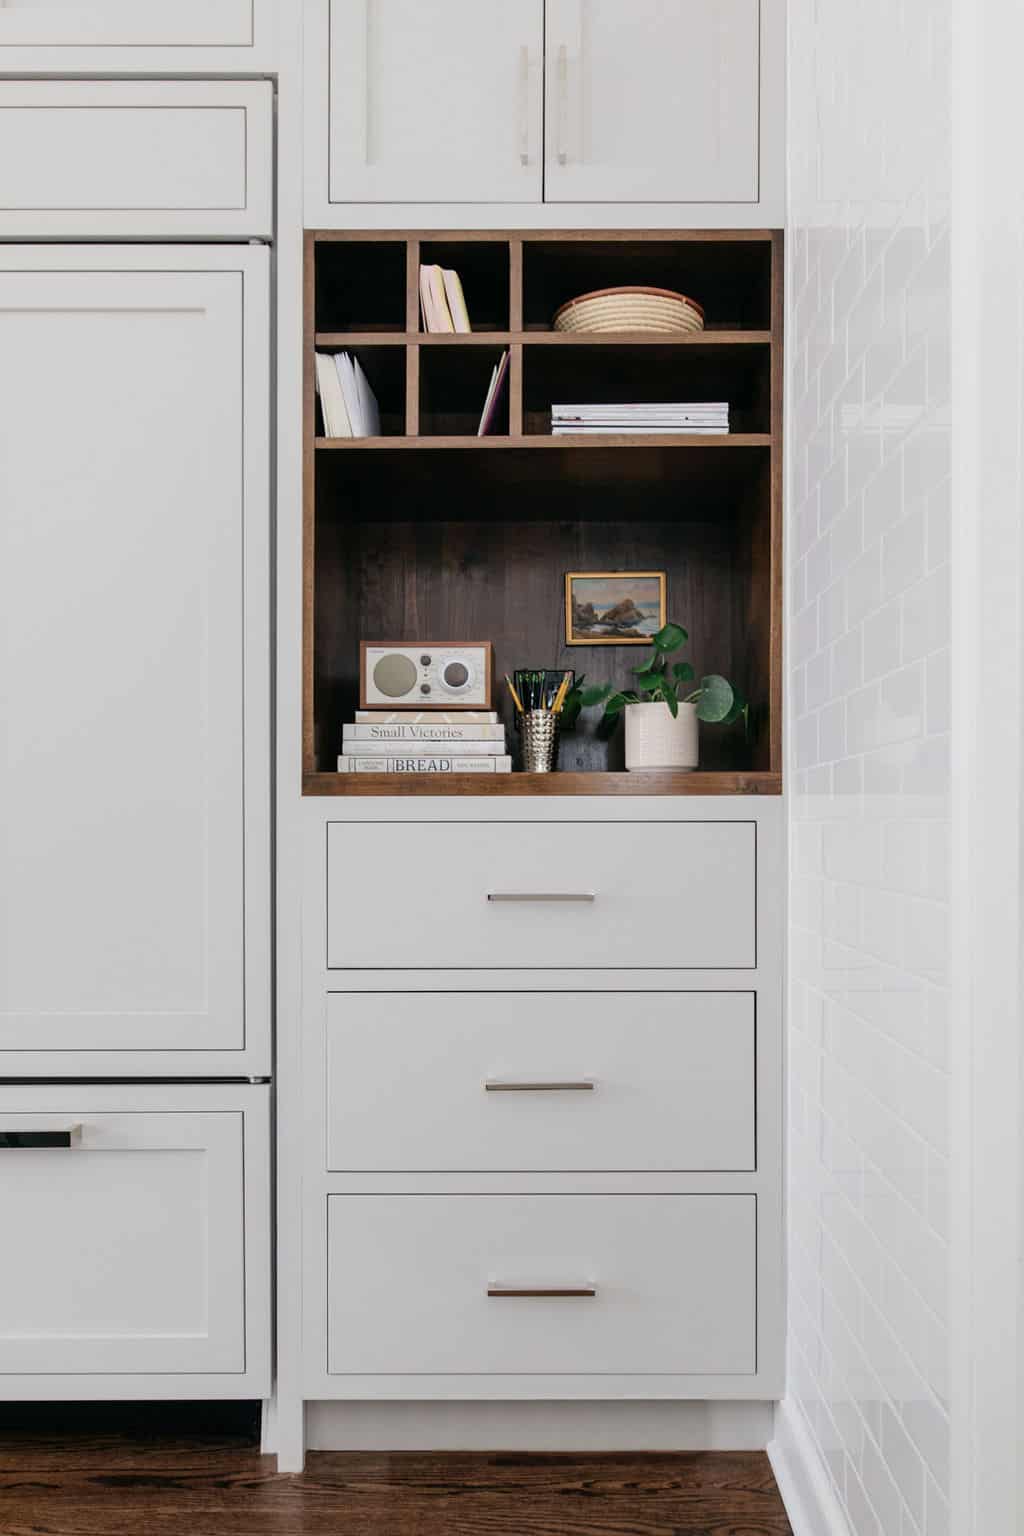
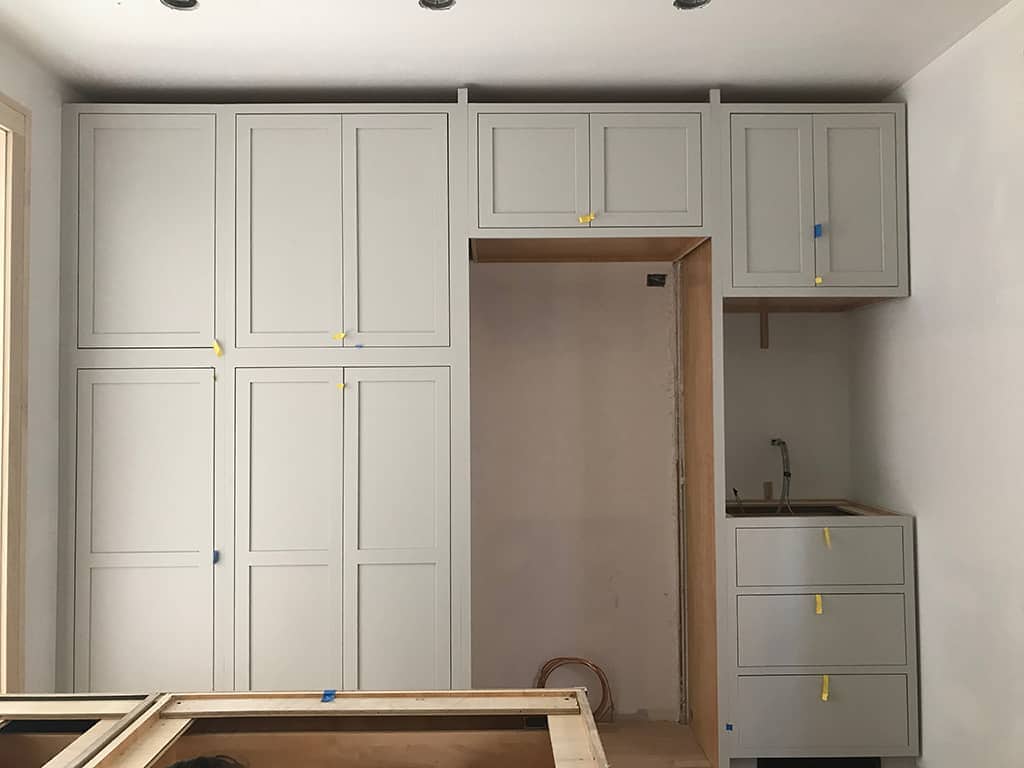
Process shot before fridge, crown or custom command center are installed.
TIP #4 – QUALITY MATERIALS
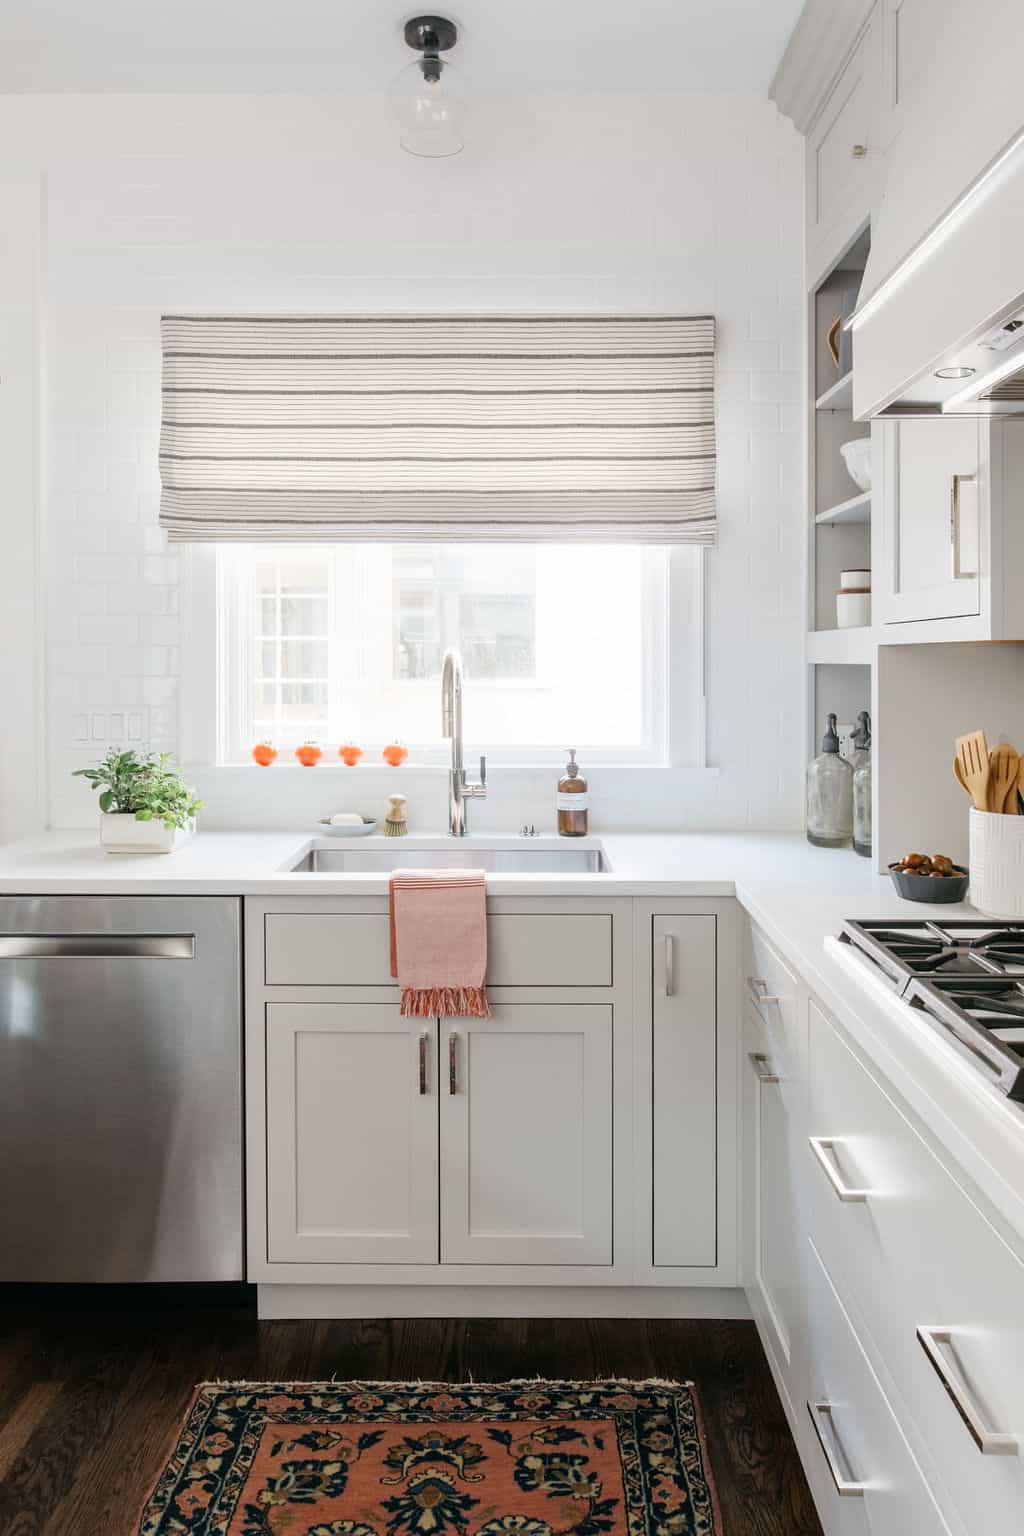
It probably goes without saying, but you pay for what you get. Get the best quality you can afford or save up a little longer! The places we saved in this kitchen included inexpensive subway tile from Home Depot, retail lighting (Rejuvenation) and retail hardware. The counter stools are Target!
TIP #5 – STYLING + DETAILS COUNT
A few elements a designer always pushes for after construction is over include a window treatment, rug and accessories. These items can really MAKE the space. Here if you look closely you can see we styled the kitchen with a different color runner, accessories and tea towel. Those small changes (and a different accent color) create a whole new vibe from the more neutral photos above. Do you like the neutral accessories or the peachy ones!?

I hope this gives you some insight into how a designer thinks about small kitchen design! If you are looking to renovate or re-design your space, we’d love to hear from you! Visit our contact page to learn more: CONTACT
photography by: Margaret Rajic
styling by: DeCleene Creative
XOXO – CLAIRE
Pin this image to share the article on Pinterest and follow us on Pinterest for more design inspiration!
Leave a Reply
October 7, 2024
read the post
YOU MIGHT ALSO LIKE
April 17, 2024
read the post
September 2, 2021
read the post
August 24, 2021
read the post

Meet Claire
Claire’s creative energy comes from her unique perspective on the world as both a trained interior designer and a passionate yoga teacher. Her affinity for kitchen design, timeless style and eclectic decorating are shared here, along with lots of interior design education and tips. Thanks for being here, please enjoy!

