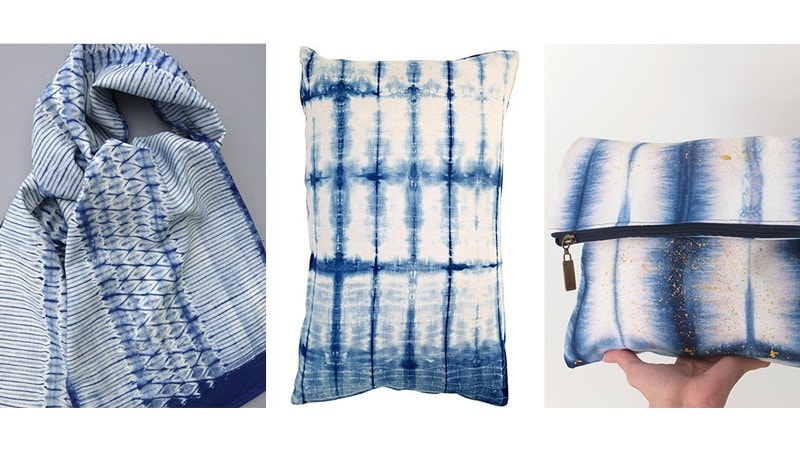
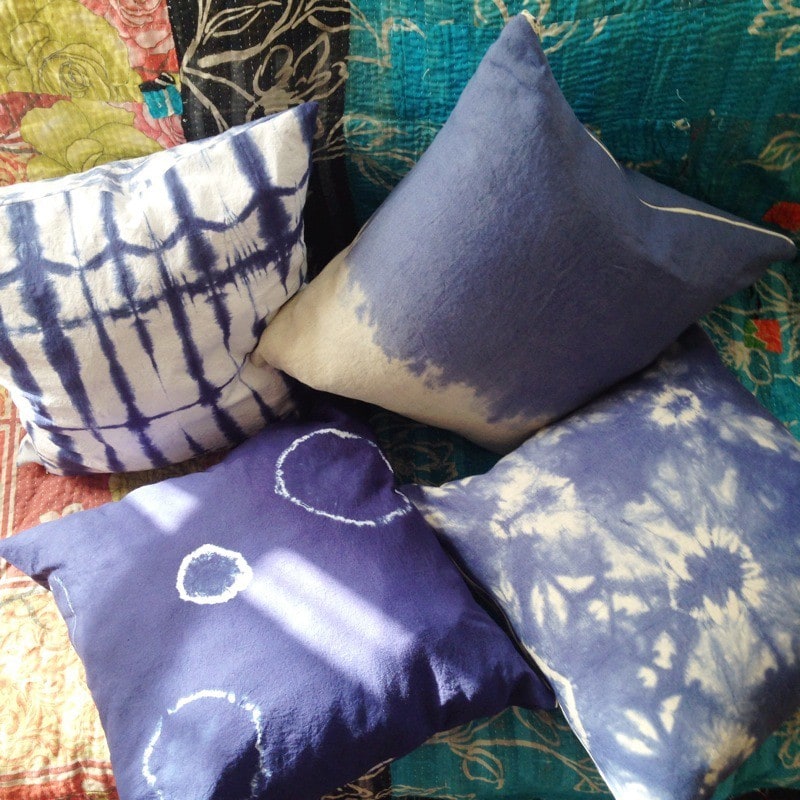
Shibori fabric has hit the mainstream design market big time this spring. You will see designer dresses, pillows, bedding and scarves all for sale for upwards of hundreds of dollars. Many of these items are beautiful and artfully made, but you can definitely get the designer look without the price tag with this DIY tutorial!
What is Shibori?
It’s a Japanese term for various methods of dyeing cloth by binding, folding, twisting and compressing. The earliest known examples of shibori techniques date back to the 8th century, when indigo dye was commonly used.
How Do I Start?
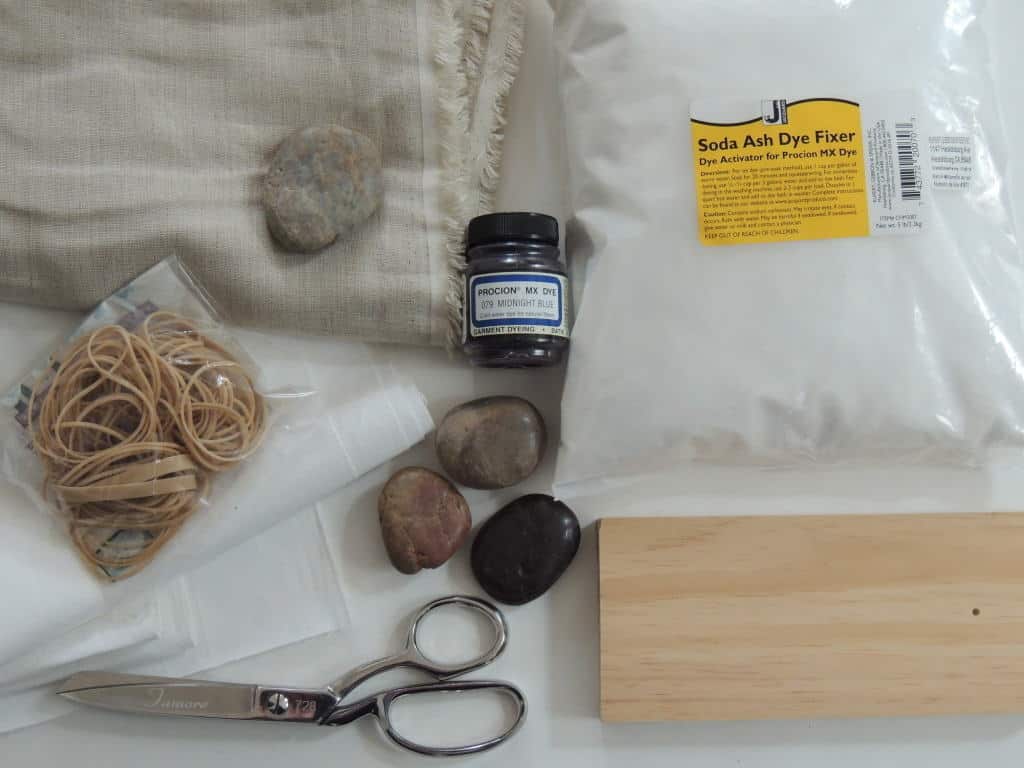
Indigo Dye Kits are available and easily found online, but they require air, work better in sunlight and need additional time to work correctly. I used a shortcut that produces similar results to indigo dye, but is essentially the common tie-dye technique. Here’s what you’ll need to gather to get started.
Supplies Needed:
- Natural fabrics such as 100% cotton or linen
- Soda Ash Dye Fixer (fixer and dye is commonly found at art/craft stores)
- Cold Water Dye for Natural Fibers (MX Dye) – Blue/Indigo/Navy
- 2 large buckets
- Scissors
- Rubber bands – multiple thicknesses
- Stones
- Optional for more folding techniques – wood, cork, PVC/copper pipe
Okay I have all my supplies. Let’s begin.
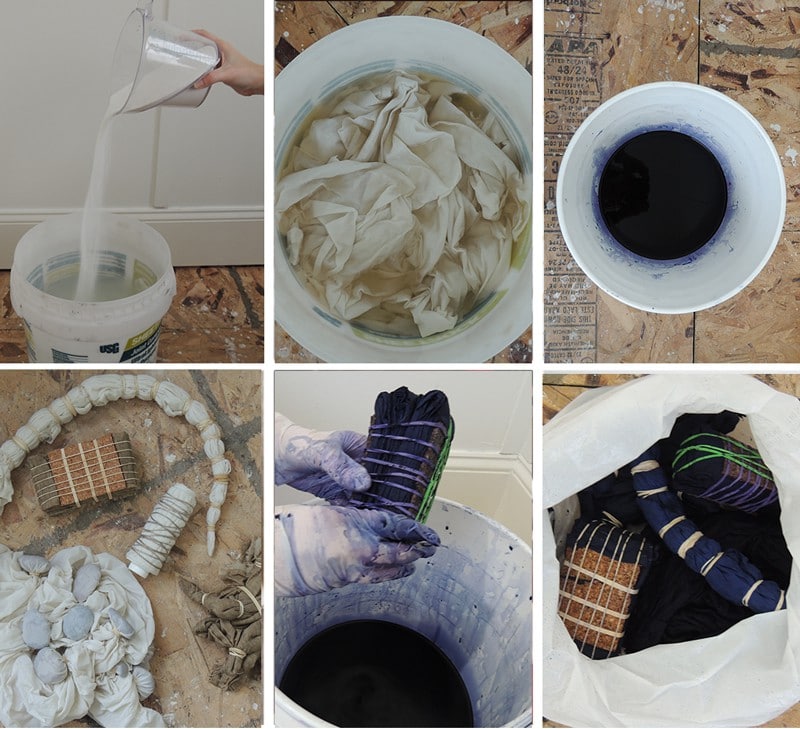
Step 1: Fill your two buckets with cool water. Follow instructions on your soda ash and pour fixer into one bucket.
Step 2: Place your fabric into the bucket with the soda ash and let it set per package directions.
Step 3: While fabric is one bucket, mix your dye in the other bucket. It’s not going to look like a ton of dye, but don’t worry a little goes a long way.
Step 4: Remove your fabric pieces from the bucket and begin to wrap/fold/twist each piece with your desired technique and pattern.
Step 5: Dip each piece into the dye bath.
Step 6: Place all dyed fabrics into a garbage bag and let them set overnight.
Some Additional Tips
It is best to wash and dry all your fabric before beginning this process for the best results. After the overnight setting of dyed fabric, rinse each bundle under cool water until the water runs mostly clear. Then cut off all rubber bands/string and wash and dry again. Don’t worry the dye is set and will not run.
Techniques:
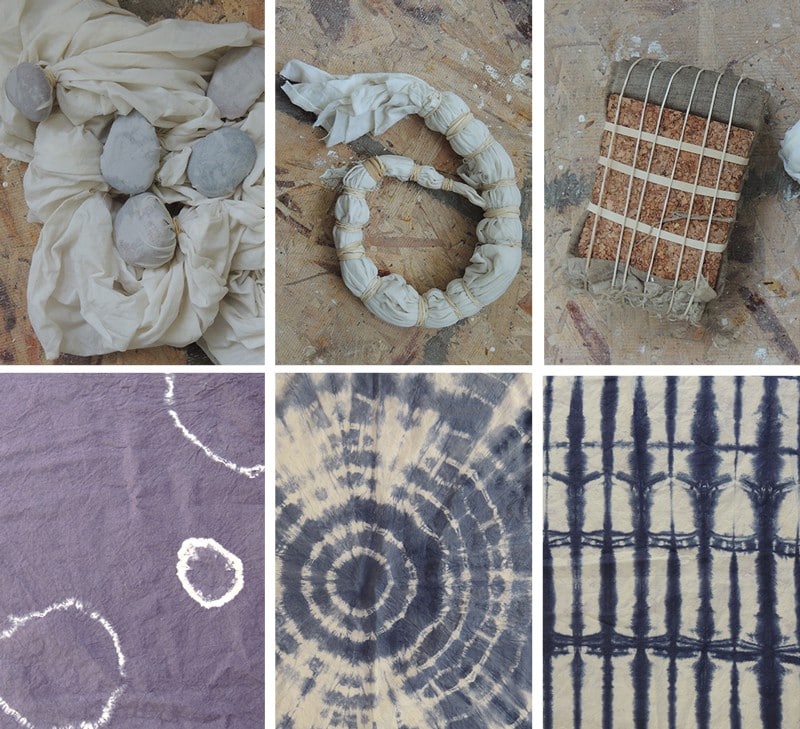
Here I’ve shown three different techniques to try. These are all resist techniques, this means where you fold, bind and rubber band your fabric you make it harder for the dye to pass through, and this creates a resist or white space where the dye cannot penetrate.
Kumo – This is a twist and bind-resist. I used river stones from a craft store, but found objects such as rocks, pebbles, and even ping-pong balls could work! It’s important to wrap your rubber bands tightly around object, so you get the white circles.
Tie-Dye-Style – You probably did this in kindergarten at some point. Pick a point you’d like to be the center of your design and pick up your fabric from that spot. Then rubber band it all the way down creating a sort of fabric snake.
Itajime – This is a shape-resist technique. Fold your cloth like an accordion back and forth, and then in half once or twice you want it to be a similar size to the piece of wood or cork you have. Sandwich the fabric between the two pieces of wood and use various rubber band pattern/widths to create an endless variation depending on your placement.
Here are a few of the finished fabrics, which I sewed into pillow cases. I made 10 yards of fabric in this one trial with the help of a friend. This is a nice project to do with someone if you can find a DIY buddy. I hope you are inspired to give it a go! Let me know if you have any questions!
XO – CLAIRE
Leave a Reply

October 7, 2024
read the post
YOU MIGHT ALSO LIKE
April 17, 2024
read the post

September 2, 2021
read the post

August 24, 2021
read the post
Meet Claire
Claire’s creative energy comes from her unique perspective on the world as both a trained interior designer and a passionate yoga teacher. Her affinity for kitchen design, timeless style and eclectic decorating are shared here, along with lots of interior design education and tips. Thanks for being here, please enjoy!
